After flashing this unofficial firmware you’ll not only experience the Android Lollipop features but also the Omni extra features which will improve the overall performance of your tablet. Samsung stopped rolling out official updates after GB for Tab P1000. So instead of using the same old Gingerbread OS you can switch to this latest Android Lollipop and experience the amazing new features. In this article, we’ll install the Omni ROM on Galaxy Tab P1000.
How to install Android 5.0.2 Lollipop on Galaxy Tab P1000
In this tutorial, we’ll go through an easy step-by-step guide on how to install Omni custom ROM based Android 5.0.2 Lollipop on Samsung Galaxy Tab GT-P1000. Let’s get straight into the process.
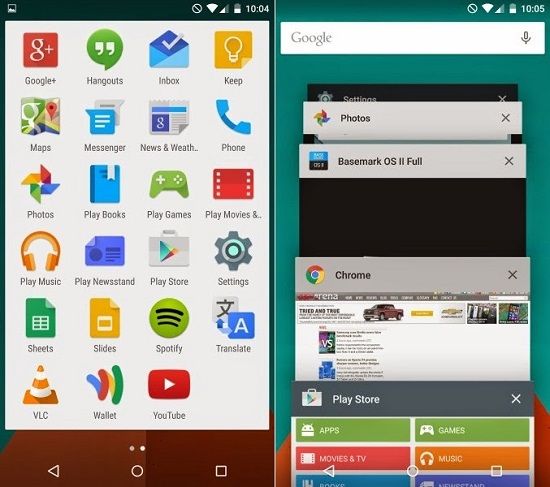
Screenshot
Disclaimer
Try every step mentioned below at your own risk. If anything goes wrong then neither we nor the developers of this ROM will be held responsible for that. Although it is very unlikely that your Galaxy Tab P1000 will get damaged still I recommend you to apply everything given below correctly and without a single mistake.
Compatibility
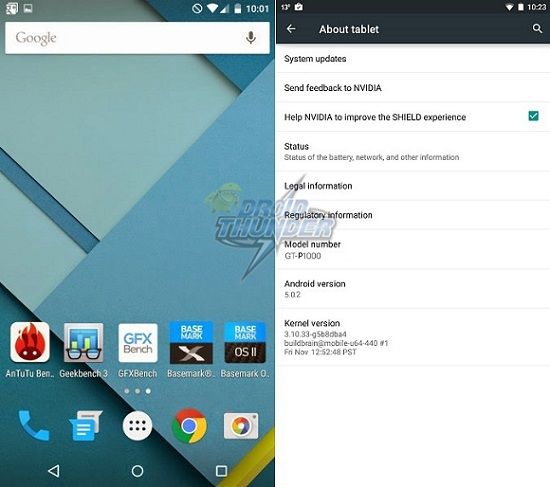
Also, note that this Omni custom ROM must be flashed only and only on Samsung Galaxy Tab having model number GT-P1000. Do not apply this ROM on any other device except the one mentioned as it might brick your tablet. Better check your device’s model number from Menu > Settings > About Tablet before proceeding further.
Requirements
Ensure that your Galaxy Tab P1000 is charged to a minimum of 60%. Backup all your tablets data and settings including contacts, messages, call logs, memos, etc. Install Samsung USB drivers on your PC. This is essential to recognize your Galaxy Tab P1000 when connected via USB data cable. Also, root and install CWM recovery on Galaxy Tab P1000. Backup the EFS folder present in your tablets system directory. This folder contains all your tablets specific information such as the IMEI, wireless devices MAC addresses, product code, and much more.
Now head on to our actual article on how to install Android 5.0 Lollipop Omni ROM on Galaxy Tab P1000.
Downloads
Google Apps SuperSU.zip Omni ROM Android 4.4.4 Omni ROM Android 5.0.2 Lollipop
Steps to install Android 5.0.2 Lollipop ROM on Galaxy Tab P1000
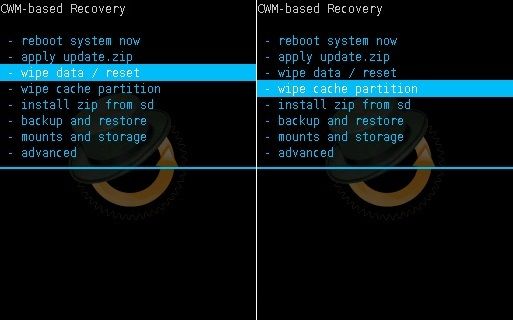
Download all the zip package files in a specific folder on your PC. Do not extract them. Now connect your Galaxy Tab P1000 to computer using a USB data cable, enable USB debugging mode, and copy the downloaded files on your tablets SD card. If the computer doesn’t recognize your Galaxy Tab P1000 then re-install the Samsung USB drivers from the link given in the Pre-Requisites section. If the problem persists then replace USB data cable or use a proper working USB port. Now safely disconnect your tablet from PC. Switch it off completely and boot into recovery mode. For that simultaneously keep pressing and holding Volume up+ Power button till you land into recovery mode. Touch won’t work in recovery mode. So use the Home button to navigate up and down and use the Search button for selection. If you are already using a custom ROM then the first thing you need to do is take a Nandroid Backup of the same. Now you need to wipe the data and cache partitions from your tablets internal memory. For doing so, navigate to the ‘wipe data/factory reset’ option using the Home key. Select it using the Search button. On the next screen press Yes option to start the wiping process. Similarly, navigate to the ‘wipe cache partition’ option and select it to wipe the caches. Note that this step will clear entire data from your tablets internal memory including contacts, messages, apps, memos, call logs etc.
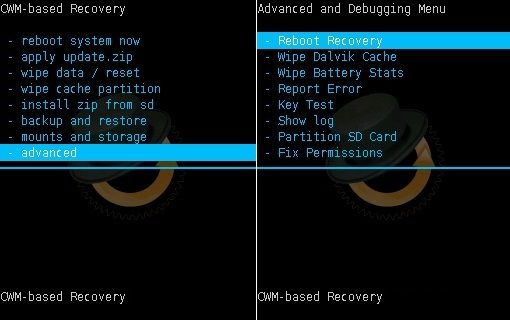
Return to the main menu and select the Advanced option located on the recovery mode itself. On the next screen select the Reboot Recovery option. Wait until you boot again into recovery.
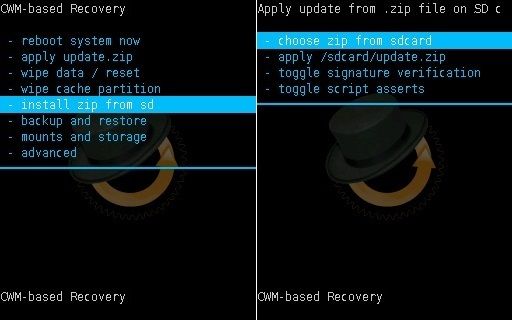
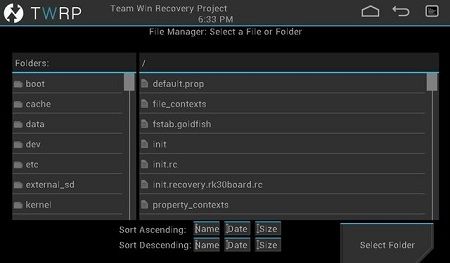
Let’s install Omni ROM on Galaxy Tab now. Now using the Home key navigate to the ‘install zip from SD card’ option. Select it using the Search button. Then on the next screen select ‘choose zip from SD card’ option. This will show you all the files and folders present on your external SD card. Then navigate to the Omni 4.4.4 ROM which you’ve copied earlier. Select it using the Search button. On the next screen select the ‘Yes’ option to start the flashing process.
After some time the tablet will automatically boot into TeamWin (TWRP) recovery. Be patient and wait until the flashing process completes. In this TWRP recovery touch works so no need to use any keys for navigation or selection.
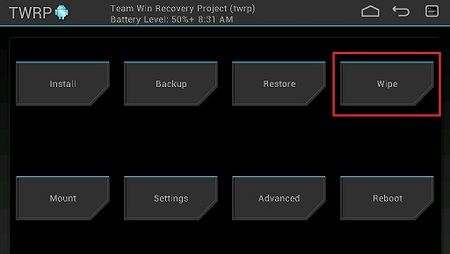
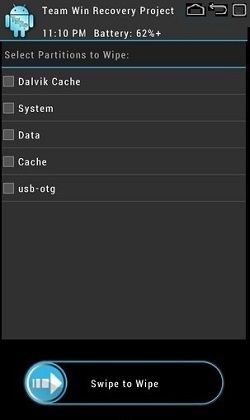
Now in TWRP, tap on the Wipe option. On the next screen select the Dalvik cache, cache, system, and data options. Then Swipe to start the wiping process. This step is essential to solve the boot loop issue.
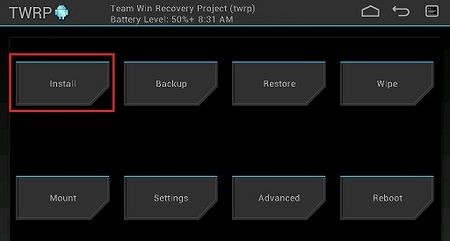
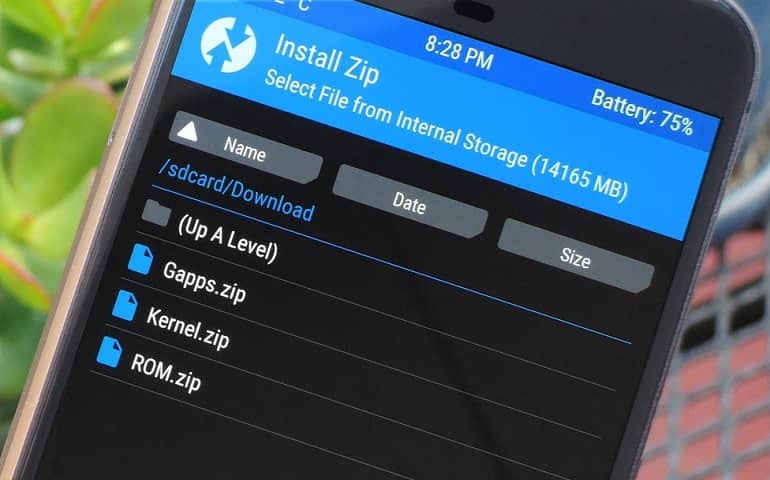
After wiping everything as mentioned return back to the main menu of TWRP recovery. Now select the Install option present there.
On the next screen navigate to the Android 5.0.2 based Omni custom ROM and select it. Swipe to start the actual Android 5.0.2 Lollipop Omni ROM flashing process.
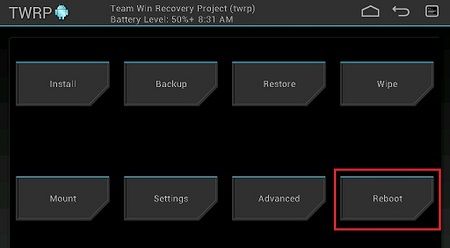
It is recommended to flash the Omni 5.0.2 ROM two times for a successful installation. Similarly, flash the Google Apps package as well as SuperSU.zip file as you’ve flashed the ROM. Just remember not to wipe data/cache after that. Just reboot your Samsung Galaxy Tab P1000 by selecting a reboot option from the TWRP recovery mode. Note that the first boot takes more time to start than usual.
If you want to restore your previous saved ROM, then you can do that by going back to the recovery mode by pressing & holding Volume up + Power Button simultaneously and selecting the Restore option. Then select the saved ROM you want to restore.
Conclusion
Finally! This is how you can successfully install Android 5.0.2 Lollipop ROM on Galaxy Tab GT-P1000. You can confirm that from Menu > Settings > About Tablet. Enjoy the combined features from the latest Android 5.0.2 Lollipop as well as Omni custom ROM. If you face any issues during this process, then please comment below. Source Notify me of follow-up comments by email. Notify me of new posts by email.
Δ