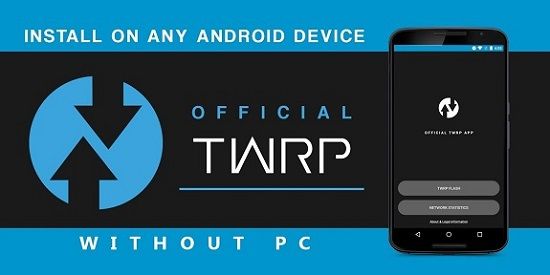
It is, therefore, often preferred over the famous ClockworkMod (CWM) custom recovery. In this easy steps guide, we’ll discuss how to install TWRP Recovery without a PC and Root. Before proceeding further, it is recommended to back up your data. This is because a disaster can knock on your door without warning, and hence you should always be prepared with a backup of your current system. You can find various tutorials online on how to install TWRP on Android, but this guide is entirely different. Here you will not require a computer to install TWRP on Android. We will not use the Odin tool or any software for flashing TWRP without a PC on any Android device. Also, no matter which Android device you have, a smartphone, tablet, console, etc. This guide will help you to install TWRP on any Android Device. Download TWRP for Redmi Note, Poco f1, Coolpad, Xiaomi, Mi, Moto, Samsung Galaxy, Vivo, OnePlus, Micromax, Sony Xperia, Lenovo, etc. Without further ado, let’s move on to our guide on installing TWRP without a PC on any Android device.
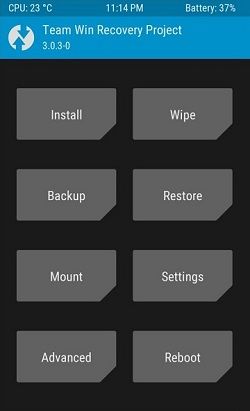
How to Install TWRP Recovery without PC
In this guide, we’ll go through two methods to flash custom recovery without using a Computer.
Method 1: Official TWRP App
At first, we’ll use the official TWRP app to install the custom recovery file on any Android phone.
Downloads
TWRP App
Steps to Install TWRP Recovery without PC
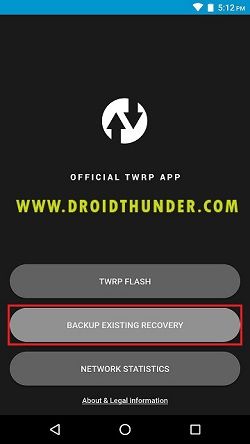
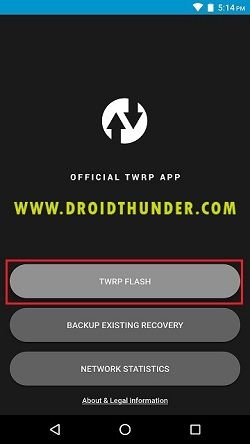
At first, root Android using the Kingoroot app. Download and install the official TWRP app from the link given above. Launch the app and tick all three checkboxes shown to accept the terms and conditions. Then press OK. As soon as you accept the terms and conditions, the TWRP app will further ask for granting root access. So click on Grant on the Superuser popup. Before flashing the official TWRP recovery on any Android phone, it is necessary to back up your current stock recovery. This is highly recommended because if you encounter any difficulty while flashing TWRP, you can easily revert your existing stock recovery. To take a backup, click on the Backup Existing Recovery option from the main menu of the TWRP app.
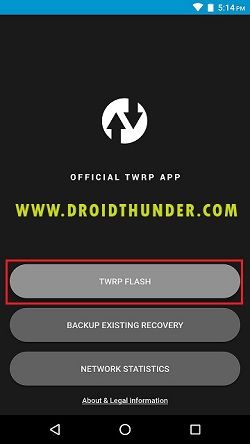
On the next screen, click on the Backup Recovery option. And confirm the backup by pressing okay. The backup process will take a while to complete. So be patient and wait. A copy of the existing recovery image will be saved on your phone’s internal storage or SD card when it completes successfully. You can restore this recovery using the TWRP Flash option from the app. Let us download and install TWRP without a PC now. To do so, click on the TWRP flash option from the main menu.
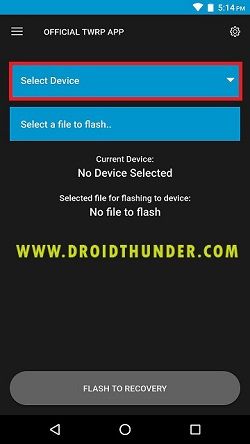
On the next screen, click on the Select Device option.
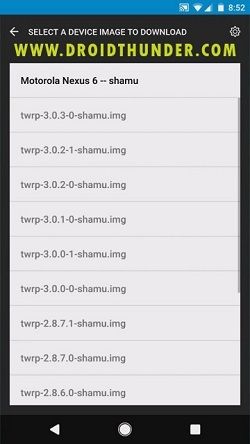
This will show a list of Android devices. Just search for your phone model from the list and select it. After selecting the Android device, you will be asked to choose a TWRP version from the list of twrp.img files.
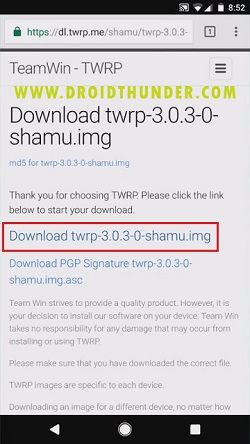
We recommend selecting the latest version of TWRP, which will be first on the list. As soon as you select a particular TWRP.img file, you’ll be redirected to a download page in your browser. In the browser, tap on the download link to initiate the TWRP recovery downloading process.
When the downloading completes successfully, head back to the Official TWRP app. We’ll install the downloaded TWRP recovery now. To do so, click on the TWRP flash option from the app’s main menu.
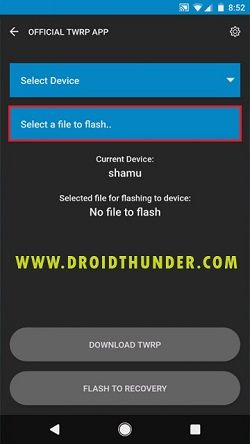
On the next screen, click on the Select a file to flash option.
This will show the files present on your phone. Just navigate to the downloaded TWRP.img file and select it.
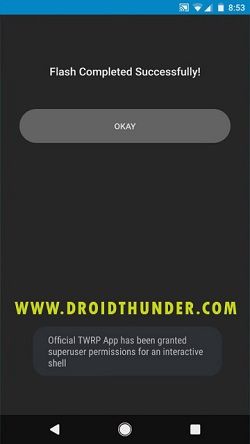
This will open the downloaded TWRP.img file in the app. Just initiate the TWRP recovery flashing process now. For that, click on the Flash to Recovery option. Confirm the flashing by pressing Okay. This will start the process of installing TWRP without a PC. It will hardly complete within a few seconds. As soon as the flashing completes, the TWRP app will show a message saying Flash completed successfully! This is how you can install TWRP without a PC using easy steps.
Method 2: Termux App
Here, we’ll use the ADB & Fastboot commands using the Termux application. This method is a bit more complicated and requires two Android smartphones. Let’s look at the detailed requirements for this method.
Requirements
Downloads
Termux App
Steps to Install TWRP without PC
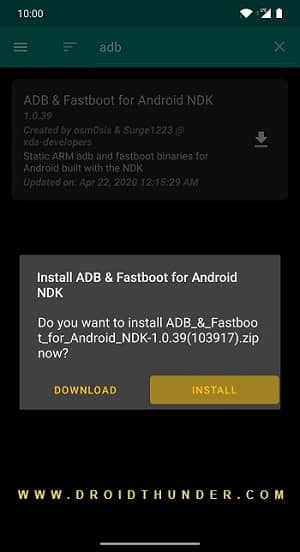
Launch Magisk Manager on the Android phone with root access. Go to the downloads section and type ‘adb’ in the search tab.
Download and Install the ADB & Fastboot for Android NDK module.
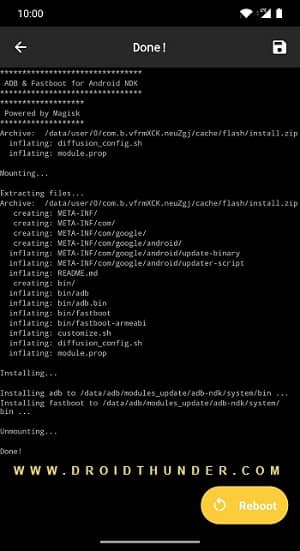
Upon successful installation, click on the Reboot option to activate the module.
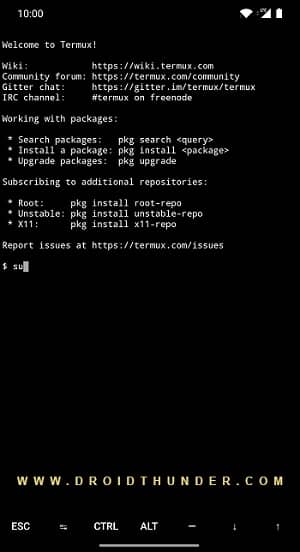
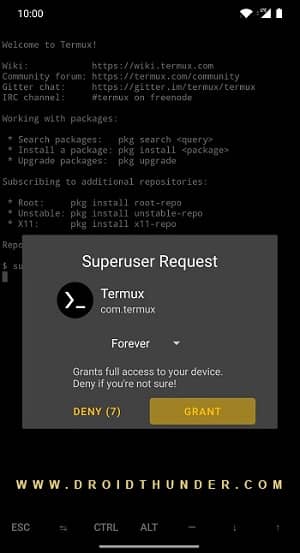
Download TWRP recovery.img file for your Android device. Make sure to download the TWRP recovery in IMG format. Place the downloaded file in the Download folder on both Android phones. Moreover, rename the file to ‘twrp.’ Furthermore, download and install the Termux app on your rooted phone. Enable the USB debugging mode on your target phone. Connect both Android devices to each other using an OTG adapter or USB data cable. A USB debugging message will pop up when you connect both phones. Just click on the Allow button. Remove and reconnect both devices if such a message doesn’t appear. Launch the Termux app on a rooted Android phone. Now we’ll use a few commands to flash TWRP using the Termux app. Type the following command in Termux and press the enter key:
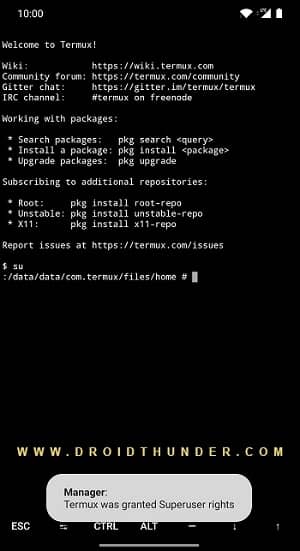
su
Click on Grant to allow the SuperSU request.
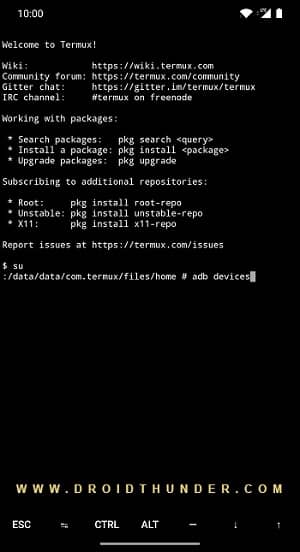
Now, type the next command to confirm the successful connection between both phones.
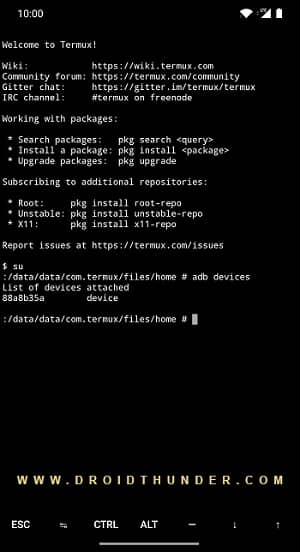
adb devices
As soon as you hit the enter key, you’ll see a random number with a list of devices attached message.
This will confirm that the connected phones can now communicate using the ADB interface. Type the next command to boot into Fastboot mode.
adb reboot bootloader
Now, let’s locate and install the recovery image file. Hence, enter the following command to find the recovery file.
cd /sdcard/Download
This command will redirect the terminal window to the Download folder. To start the recovery flashing process, type the below command.
fastboot flash recovery twrp.img
This command will begin the recovery installation process. Upon completion, enter the below command to restart the device in TWRP recovery.
fastboot reboot recovery
Now you can safely disconnect the USB cable from both devices.
Steps to boot into TWRP Recovery on Android
Download and install the Recovery Reboot app. Launch the app and tick the I have read and accept the terms. Then click on confirm. To enter TWRP recovery mode, click on the Recovery option. Click on Yes to confirm. As soon as you press Yes, a popup will appear to grant Superuser permissions. So click on the Grant option. This will boot your Android phone into TWRP Recovery mode.
Wrapping Up
Finally! This is how you can install TWRP without a PC on any Android phone. Besides rooting Android, now you can flash custom ROMs, kernels, mods like Magisk or Xposed, etc. Let us know your suggestions or queries in the comment box below. Notify me of follow-up comments by email. Notify me of new posts by email.
Δ Sorry to ask you this question since I am a beginner to all these android stuffs & I have never done anything like this before.. On method #1, the gist I got is Team Win’s app can flash a CR in lieu of a PC for a rooted device, which mine is. From there, I still question if the process works on a bootloader-locked device, which mine isn’t.